
 Pin it
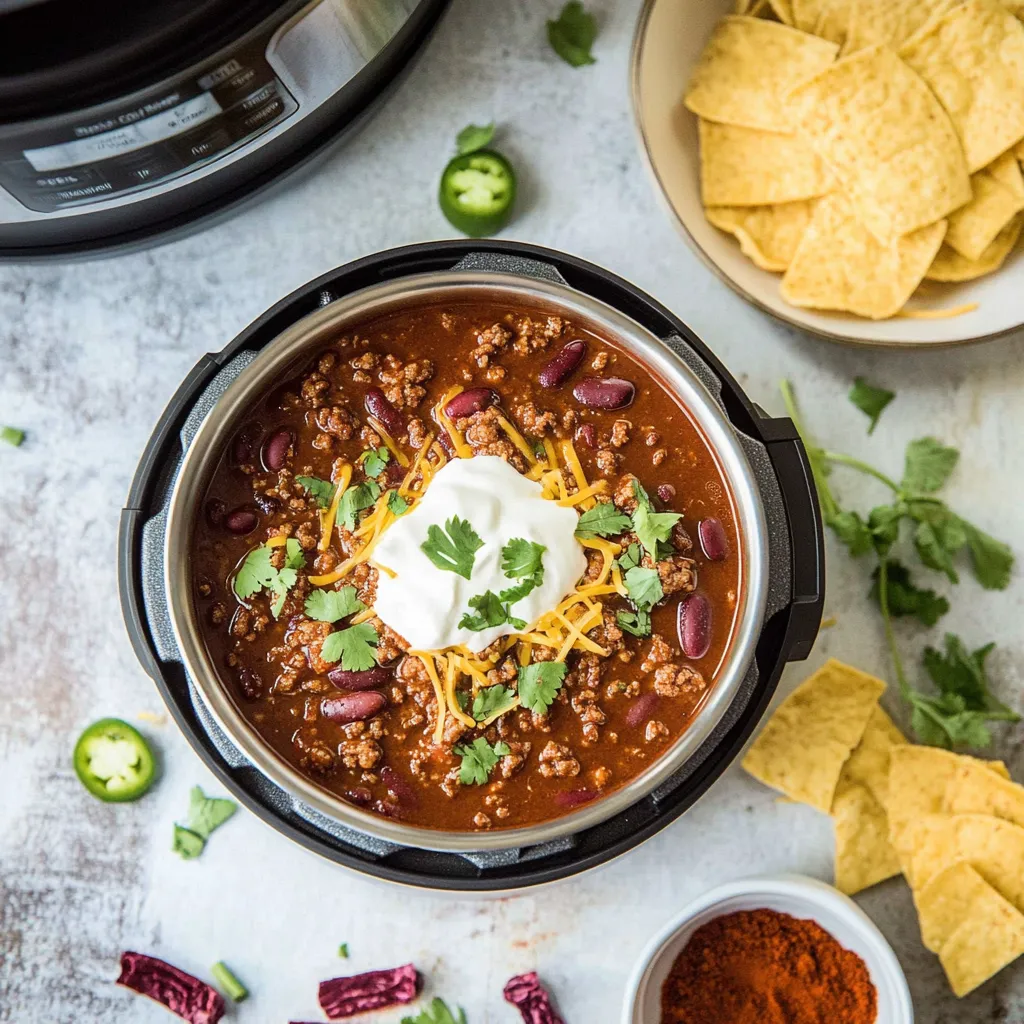
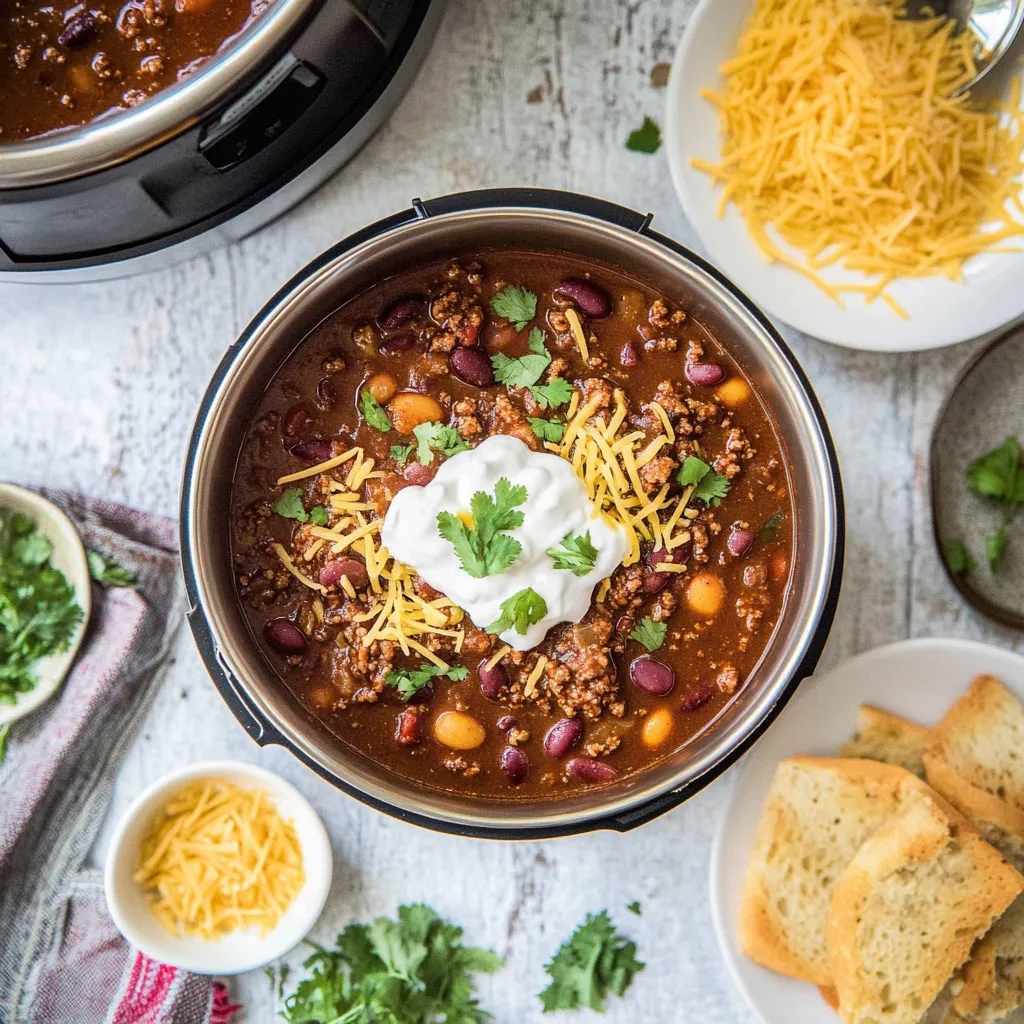
Instant Pot Chili
There's something deeply satisfying about a bowl of homemade chili – the rich tomato base, tender meat, hearty beans, and that perfect blend of spices that warms you from the inside out. This Instant Pot Chili delivers all those comforting flavors in a fraction of the time traditional methods require. The pressure cooking process infuses every bite with intense flavor while breaking down the meat to tender perfection. What would normally simmer all day on the stovetop or in a slow cooker transforms into a hearty, flavorful meal in just 40 minutes – without sacrificing any of the depth or complexity that makes great chili so irresistible.
Last weekend, I served this chili during our neighborhood football watch party. Everyone kept asking when I had started cooking, assuming it had been simmering since morning. The looks on their faces when I revealed it had only taken 40 minutes from start to finish were priceless! My friend Mark, who claims to be a chili purist, actually asked for the recipe – the ultimate compliment from someone who typically insists chili needs to cook "low and slow" to develop proper flavor.
Essential Ingredients and Selection Tips
- Ground Beef: Opt for 90/10 lean ground beef for the perfect balance of flavor and reduced grease. The pressure cooking tenderizes even leaner cuts beautifully, so you don't need extra fat for moisture. If the package doesn't specify the lean percentage, look for ground beef labeled "ground sirloin" for a similar lean-to-fat ratio
- Canned Tomatoes: The combination of diced tomatoes with green chiles (like Rotel), crushed tomatoes, and tomato sauce creates a perfect texture with both chunky and smooth elements. Look for fire-roasted varieties of the diced tomatoes for an extra layer of smoky flavor
- Beans: The contrast between kidney beans and black beans provides visual appeal and textural variety. Kidney beans hold their shape well while black beans break down slightly, adding creaminess to the chili base. Always drain and rinse canned beans to remove excess sodium and starch
- Beef Broth: While water works in a pinch, beef broth adds significant depth of flavor. I prefer low-sodium varieties to control the overall salt level in the dish. For an even richer flavor, consider using beef bone broth instead
After years of making chili, I've discovered that the order of operations significantly impacts the final flavor. Properly browning the meat before adding other ingredients creates a foundation of rich, savory notes that can't be achieved any other way. Taking the extra few minutes to deglaze the pot with broth ensures you capture all those flavorful browned bits from the bottom – a simple step that makes a noticeable difference in the depth of your chili.
Detailed Cooking Instructions
 Pin it
Meat Browning
Begin by setting your Instant Pot to "Sauté" mode and wait until the display reads "Hot." This preheating step is crucial for properly browning meat rather than steaming it. Add your ground beef to the hot pot, breaking it into small pieces with a wooden spoon or spatula. Allow the meat to cook undisturbed for about 30 seconds before stirring to develop those flavorful browned bits on the bottom of the pot. Continue cooking for about 5 minutes total, stirring occasionally, until no pink remains. If you're using particularly lean beef and concerned about sticking, you can add a tablespoon of olive oil before adding the meat, but I rarely find this necessary with the 90/10 blend. Proper browning at this stage builds the foundation of flavor for your entire chili.
Deglazing Process
Once the meat is browned, immediately pour in 1 cup of beef broth while the pot is still hot. Using your wooden spoon or spatula, scrape vigorously at the bottom of the pot to release any browned bits that have stuck to the surface. This deglazing step is absolutely critical not only for flavor development but also to prevent the dreaded "burn" notice during pressure cooking. Those caramelized bits contain concentrated flavor compounds that will dissolve into your chili, adding remarkable depth. Take your time with this step – a thorough deglazing typically takes about 30-45 seconds of active scraping. The liquid should take on a brownish tint as it incorporates those flavorful bits.
Vegetable and Bean Addition
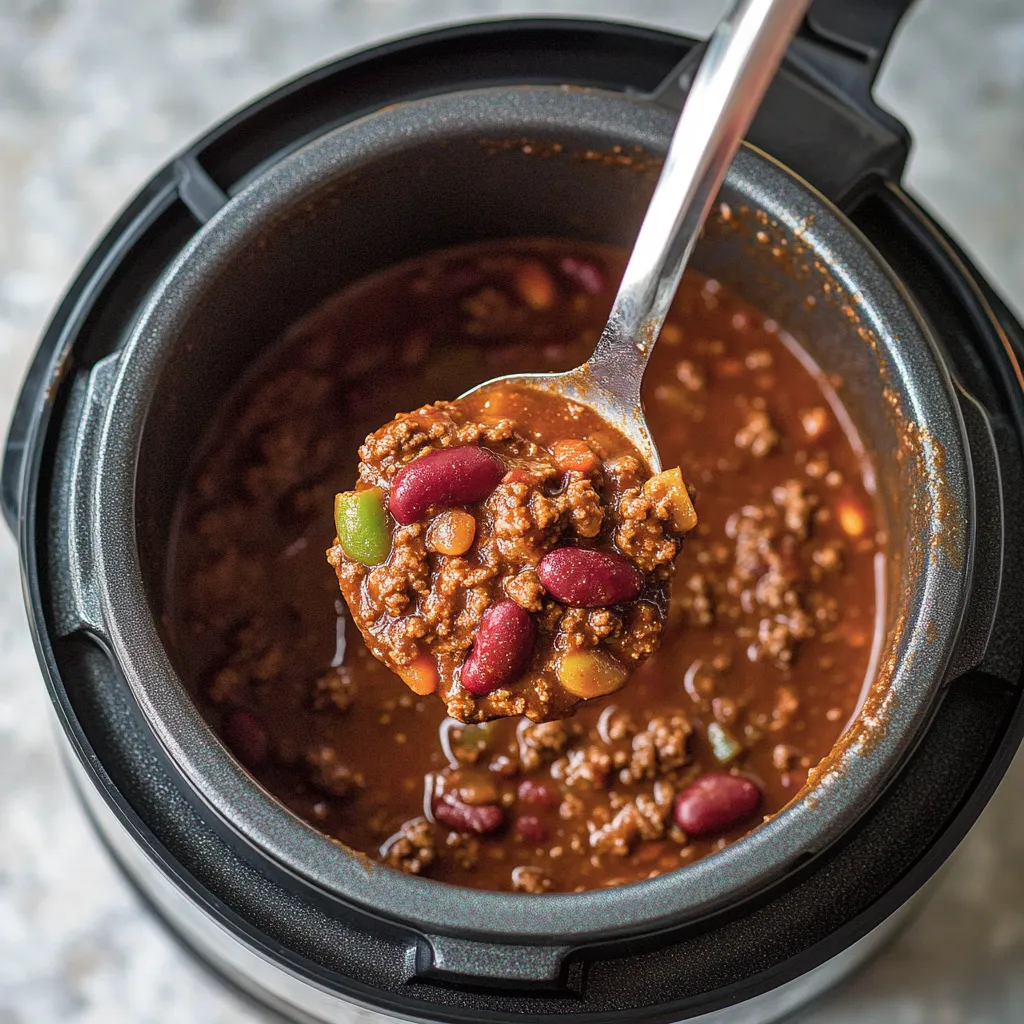
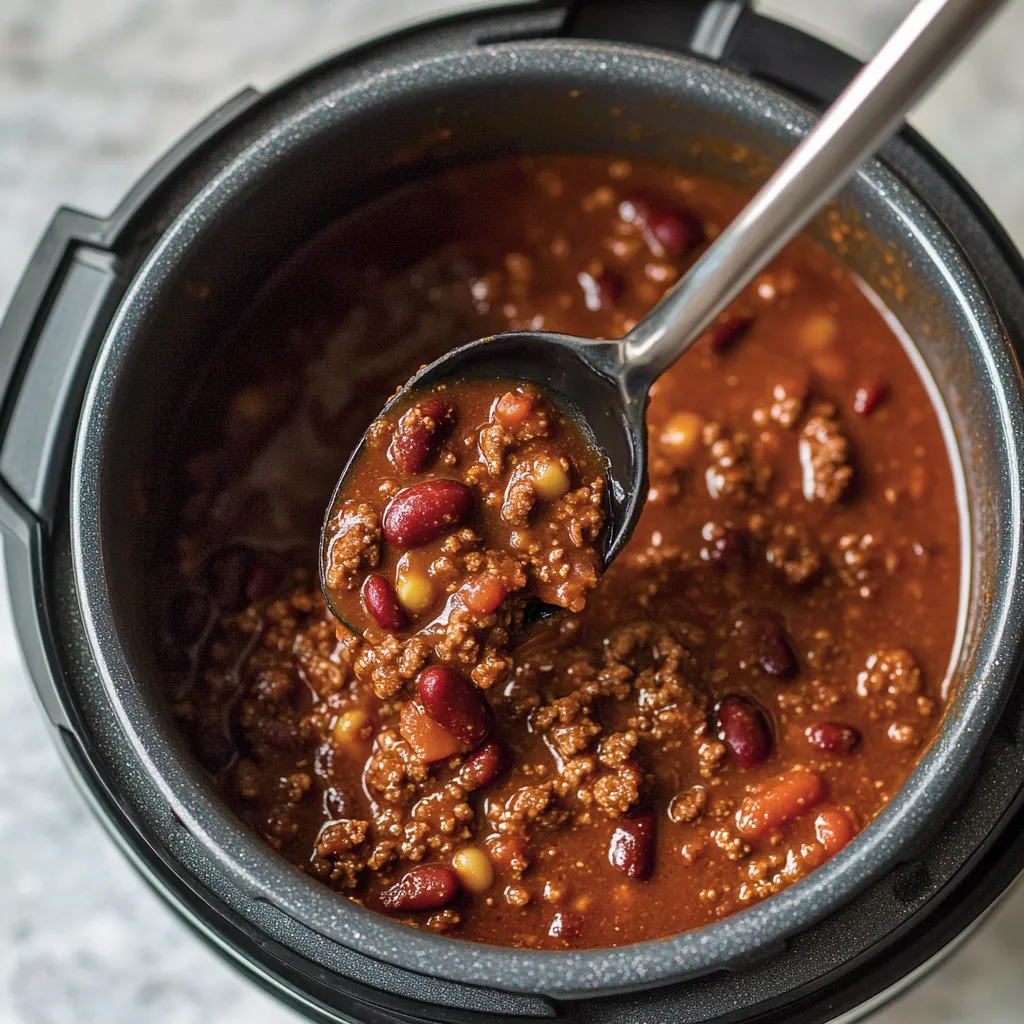
With the pot properly deglazed, it's time to build the body of your chili. Add one diced onion and one diced green bell pepper, stirring to combine with the meat and broth. Next, add the drained and rinsed beans – one can each of kidney beans and black beans. The order matters here: adding vegetables and beans before the tomato products prevents the dense tomato mixture from settling on the bottom where it might cause burning during pressure cooking. Pour in one can of diced tomatoes with green chiles (undrained), one 28-ounce can of crushed tomatoes, and one 8-ounce can of tomato sauce. Gently stir the mixture, being careful not to mash the beans. The liquid should look plentiful at this stage – it will reduce and thicken during and after cooking.
Spice Incorporation
Now for the magical transformation from tomato soup to chili – the spices! Add 2 tablespoons of chili powder, 1 tablespoon of ground cumin, 1 teaspoon of oregano (Mexican oregano if available), 1 teaspoon of garlic powder, 1 teaspoon of salt, and ½ teaspoon of black pepper. Stir thoroughly to distribute the spices evenly throughout the mixture. At this stage, resist the urge to add more salt – the pressure cooking will intensify flavors, and the sodium from the canned products will concentrate. You can always adjust seasonings after cooking. For heat lovers, this is the time to add a dash of hot sauce or a pinch of cayenne pepper, but remember that the pressure cooking will amplify spicy heat as well.
Pressure Cooking
With all ingredients combined, it's time to seal the Instant Pot. First, press "Cancel" to turn off the Sauté function. Close the lid securely and set the pressure release valve to the "Sealing" position. Select the "Manual" or "Pressure Cook" button (depending on your model) and set the timer for 25 minutes at high pressure. It will take approximately 10-15 minutes for the pot to come to pressure before the cooking countdown begins. During this time, the flavors begin melding as the temperature rises. The 25-minute cook time allows the spices to fully infuse throughout the chili while tenderizing the meat and vegetables to perfect consistency. This is the hands-off magic of pressure cooking – no stirring or monitoring required.
Pressure Release and Finishing
When the cooking cycle completes and the pot beeps, carefully perform a quick pressure release by moving the valve to "Venting," keeping your hands and face away from the steam. Once the float valve drops, it's safe to open the lid. The aroma that greets you will be intoxicating! Give the chili a thorough stir, noticing how the consistency has thickened. Now is the time to taste and adjust seasonings – you may want to add more salt, chili powder, or a dash of hot sauce depending on your preference. Allow the chili to rest uncovered for 10 minutes; it will continue to thicken as it cools slightly. This resting period is not just about temperature – it allows the flavors to settle and meld in their final form.
 Pin it
The first time I made chili in my Instant Pot, I was admittedly skeptical. Having grown up in a household where chili simmered all day, the idea of pressure-cooked chili seemed almost sacrilegious. But that first bite convinced me – the flavors were remarkably deep and well-developed, the texture perfect, and the convenience unbeatable. What was once a weekend-only meal has now become a regular weeknight staple in our home, saving me hours of cooking time without sacrificing any of the comfort and satisfaction of traditional chili.
Customization Options
One of my favorite aspects of this recipe is its versatility. For a milder version perfect for kids, simply reduce the chili powder to 1 tablespoon. For heat seekers, add a diced jalapeño with the vegetables or incorporate a teaspoon of chipotle powder with the spices. Meat variations work beautifully as well – ground turkey creates a lighter version, while a combination of ground beef and Italian sausage adds wonderful complexity. For a vegetarian adaptation, omit the meat and double the beans, adding a diced zucchini and yellow squash for bulk and nutrition. The pressure cooking method adapts well to all these variations.
Secret Flavor Boosters
For those looking to elevate this chili beyond delicious to extraordinary, consider these chef-inspired additions: A tablespoon of unsweetened cocoa powder added with the spices creates remarkable depth without adding sweetness – a trick borrowed from Mexican mole sauces. A tablespoon of brown sugar balances the acidity of the tomatoes while enhancing the natural sweetness of the onions and peppers. For an unexpected umami boost, add a tablespoon of soy sauce or Worcestershire sauce with the broth during deglazing. Each of these additions contributes subtle complexity that will have tasters wondering about your secret ingredient.
Serving Suggestions
While chili is undeniably delicious on its own, the toppings and accompaniments can transform it into a customizable feast. I love setting up a "chili bar" with bowls of shredded cheese (sharp cheddar and Monterey Jack work beautifully), diced green onions, sour cream, diced avocado, fresh cilantro, lime wedges, pickled jalapeños, and corn chips or oyster crackers. For a heartier meal, serve the chili over baked potatoes, brown rice, or pasta. For entertaining, hollowed-out bread bowls make for an impressive presentation that eliminates the need for dishes – the edible container soaks up the flavorful chili with each bite.
 Pin it
Cultural and Historical Context
This Instant Pot Chili represents what I love most about home cooking – the ability to create deeply satisfying food that nourishes both body and soul, without requiring hours in the kitchen. The pressure cooker simply accelerates the process that would naturally occur over hours of simmering, resulting in a chili that tastes like it was lovingly tended all day but fits into our busy lives.
Personal Reflection
Whether served on a cold winter evening, for game day gatherings, or as a hearty weeknight dinner, this chili brings people together around the table – and isn't that what cooking is ultimately about?
Final Thoughts
The evolution of this recipe in my kitchen mirrors my own culinary journey – starting with traditional methods and gradually embracing new techniques that honor the essence of comfort food while adapting to modern lifestyles.
Bon appétit! 🥣🔥
Frequently Asked Questions
- → Can I use dried beans instead of canned?
- Yes, but they need to be cooked separately first. Dried beans would not cook completely in the time allotted for this recipe. Pre-cook them according to package directions, then add them when you would add the canned beans.
- → What's the difference between a quick release and natural release?
- Quick release means manually turning the valve to release pressure immediately when cooking completes. Natural release means letting the pressure decrease on its own. This recipe works with either method.
- → How can I make this chili spicier?
- Add 1-2 diced jalapeños with the vegetables, use hot green chiles instead of mild, or add 1/2-1 teaspoon cayenne pepper with the other spices. You can also serve with hot sauce on the side.
- → Can I make this with ground turkey instead of beef?
- Absolutely! Ground turkey, chicken, or even plant-based meat alternatives work well. The cooking time remains the same.
- → What are good toppings for this chili?
- Popular toppings include shredded cheese, sour cream, diced avocado, fresh cilantro, sliced green onions, crumbled tortilla chips, lime wedges, or diced red onion.