
 Pin it
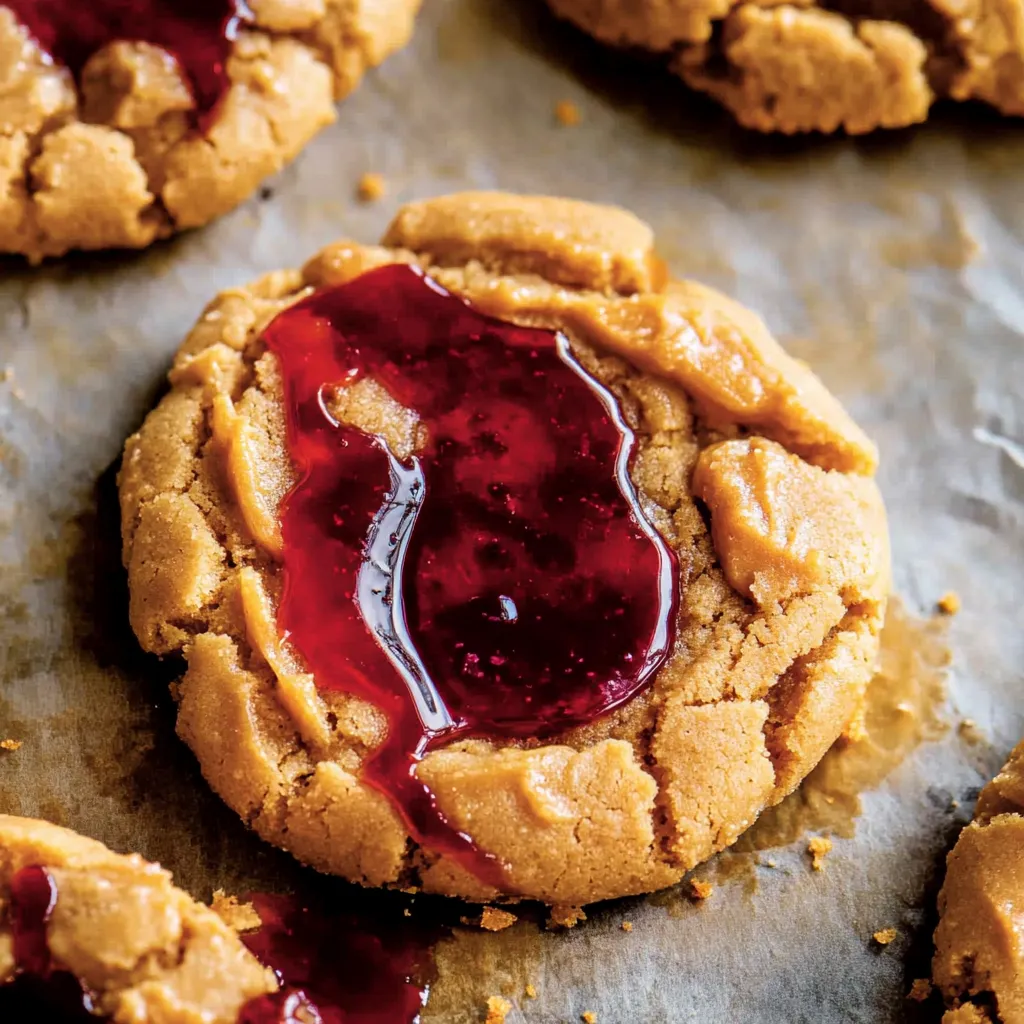
The moment you bite into these Peanut Butter and Jelly Cookies, you'll experience all the nostalgic comfort of a classic PB&J sandwich transformed into a soft, chewy cookie. Each tender peanut butter cookie cradles a sweet pool of fruity jelly, creating the perfect balance of flavors in every bite. Through extensive testing in my kitchen, I've discovered that the key to making these cookies exceptional lies in proper ingredient temperature and careful attention to the filling process.
Last weekend, I served these at a casual gathering, and even the adults couldn't resist reaching for seconds. The secret lies in using quality peanut butter and taking time with the indentation process.
Essential Ingredients and Selection Tips
- All-Purpose Flour (1½ cups) - Spoon and level for accurate measurement
- Unsalted Butter (½ cup) - Softened to room temperature
- Granulated Sugar (½ cup) - Regular white sugar works best
- Brown Sugar (½ cup) - Pack firmly when measuring
- Creamy Peanut Butter (¾ cup) - Use traditional, not natural-style
- Large Egg (1) - Room temperature for better incorporation
- Pure Vanilla Extract (1 teaspoon) - Real vanilla, not imitation
- Baking Powder (½ teaspoon) - Check freshness for proper leavening
- Baking Soda (½ teaspoon) - Ensures proper spread
- Salt (¼ teaspoon) - Enhances flavors
- Jelly or Jam (½ cup) - Choose your favorite flavor
- Parchment Paper - For lining baking sheets
Detailed Preparation Instructions
Initial Setup
Begin by positioning your oven rack in the center position and preheating to 350°F (175°C). Line two baking sheets with parchment paper. Set out butter, egg, and peanut butter to reach room temperature - this takes about 1 hour. Having ingredients at the proper temperature is crucial for the right cookie texture.
Dry Ingredient Preparation
In a medium bowl, whisk together flour, baking powder, baking soda, and salt until thoroughly combined. This mixing ensures even distribution of leavening agents throughout the dough. Whisking also aerates the flour slightly, contributing to a tender cookie texture.
Butter and Sugar Mixture
In a large mixing bowl using an electric mixer (hand or stand), cream together softened butter, granulated sugar, and brown sugar on medium speed until light and fluffy, about 2-3 minutes. Don't shortcut this step - proper creaming incorporates air into the mixture, creating lighter cookies. Scrape down sides of bowl as needed during mixing.
Peanut Butter Integration
Add peanut butter to the creamed butter-sugar mixture. Beat on medium speed until completely incorporated and mixture is smooth and fluffy, about 1-2 minutes. The mixture should be noticeably lighter in color than when you started.
Egg and Vanilla Addition
Add room temperature egg and vanilla extract to the peanut butter mixture. Beat on medium speed until completely combined, about 1 minute. Scrape down sides of bowl to ensure even mixing. The mixture should be smooth and uniform in texture.
Combining Wet and Dry Ingredients
Gradually add dry ingredient mixture to wet ingredients in three portions, mixing on low speed after each addition just until combined. Scrape down sides of bowl between additions. Stop mixing as soon as no dry flour remains visible - overmixing leads to tough cookies. Final dough should be soft but not sticky.
Cookie Dough Portioning
Using a 1-inch cookie scoop or tablespoon measure, portion dough into equal balls, about 1 tablespoon each. Roll each portion between palms to create smooth balls. Place dough balls on prepared baking sheets, spacing them 2 inches apart to allow for spreading.
Creating Indentations
Using your thumb or the back of a clean teaspoon measuring spoon, press an indentation into the center of each dough ball. If dough sticks, lightly dust your thumb or spoon with flour. Make the indentation deep enough to hold jelly but not so deep that it breaks through to the bottom.
Initial Baking Process
Place baking sheets in preheated oven. Bake for 10-12 minutes, rotating sheets halfway through baking time. Cookies are done when edges are lightly golden but centers still look slightly underbaked. Don't overbake - they will continue setting as they cool.
Jelly Filing Process
Remove cookies from oven. While still warm, carefully reinforce indentations if they've puffed up during baking. Let cool on baking sheets for 3 minutes, then fill each indentation with approximately ½ teaspoon of jelly. Be careful not to overfill, as jelly will spread slightly as it settles.
Cooling and Setting
Allow filled cookies to cool on baking sheets for 5 additional minutes. This allows jelly to begin setting and cookies to firm up enough for moving. After 5 minutes, carefully transfer cookies to wire cooling racks to cool completely.
 Pin it
Storage Instructions
For Room Temperature Storage:
- Ensure cookies are completely cool
- Layer in airtight container with parchment between layers
- Store up to 5 days
For Refrigerator Storage:
- Place in airtight container
- Layer with parchment paper
- Keeps fresh up to 1 week
For Freezer Storage:
- Freeze unfilled cookies up to 3 months
- Add jelly after thawing
- Store in freezer-safe container
- Layer with parchment paper
Variations
Jelly Options:
- Grape (traditional)
- Strawberry (bright and fresh)
- Raspberry (slightly tart)
- Apricot (unique twist)
Cookie Base Variations:
- Add chopped peanuts for texture
- Drizzle with melted chocolate
- Roll edges in sugar before baking
- Use crunchy peanut butter
 Pin it
Final Culinary Thoughts
Through extensive testing and refinement, these Peanut Butter and Jelly Cookies have become a reliable, impressive treat that transforms a childhood favorite into something special. Whether served for casual gatherings or packaged as gifts, they consistently deliver the perfect balance of peanutty richness and sweet jelly that makes them irresistible.
Frequently Asked Questions
- → Can I use crunchy peanut butter instead of creamy?
- Yes! The recipe works with crunchy peanut butter if you prefer more texture in your cookies.
- → Why don't these cookies need to be chilled?
- The recipe is specifically formulated with the right ratio of ingredients to hold their shape without chilling, saving you time without sacrificing quality.
- → Can I freeze these cookies?
- Yes! You can freeze the shaped dough (with or without jam) and bake directly from frozen, adding 1-3 minutes to the bake time.
- → How do I know when the cookies are done?
- Look for slightly browned edges - unlike most cookies, these shouldn't be underbaked due to the jam topping.
- → How should I store these cookies?
- Store in an airtight container for up to 3 days. The jam helps keep them soft and fresh.