
 Pin it
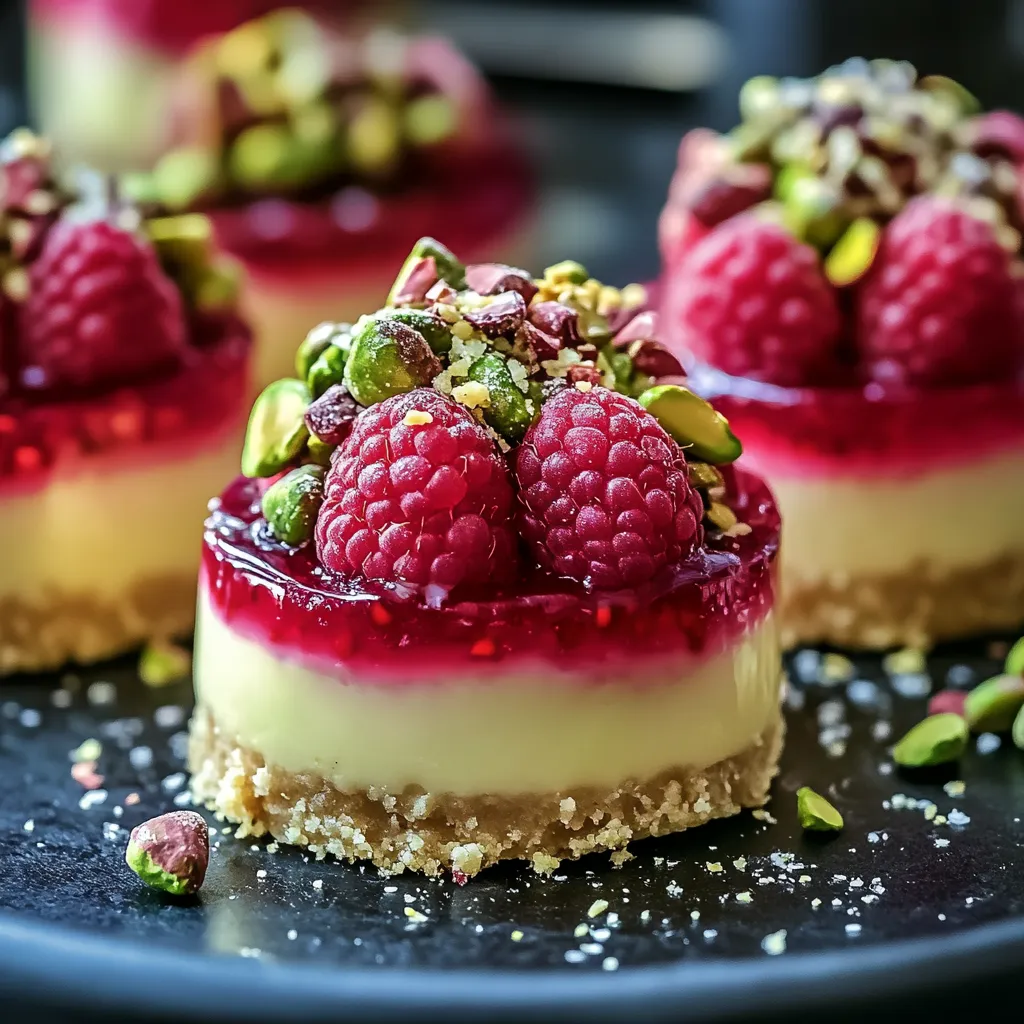
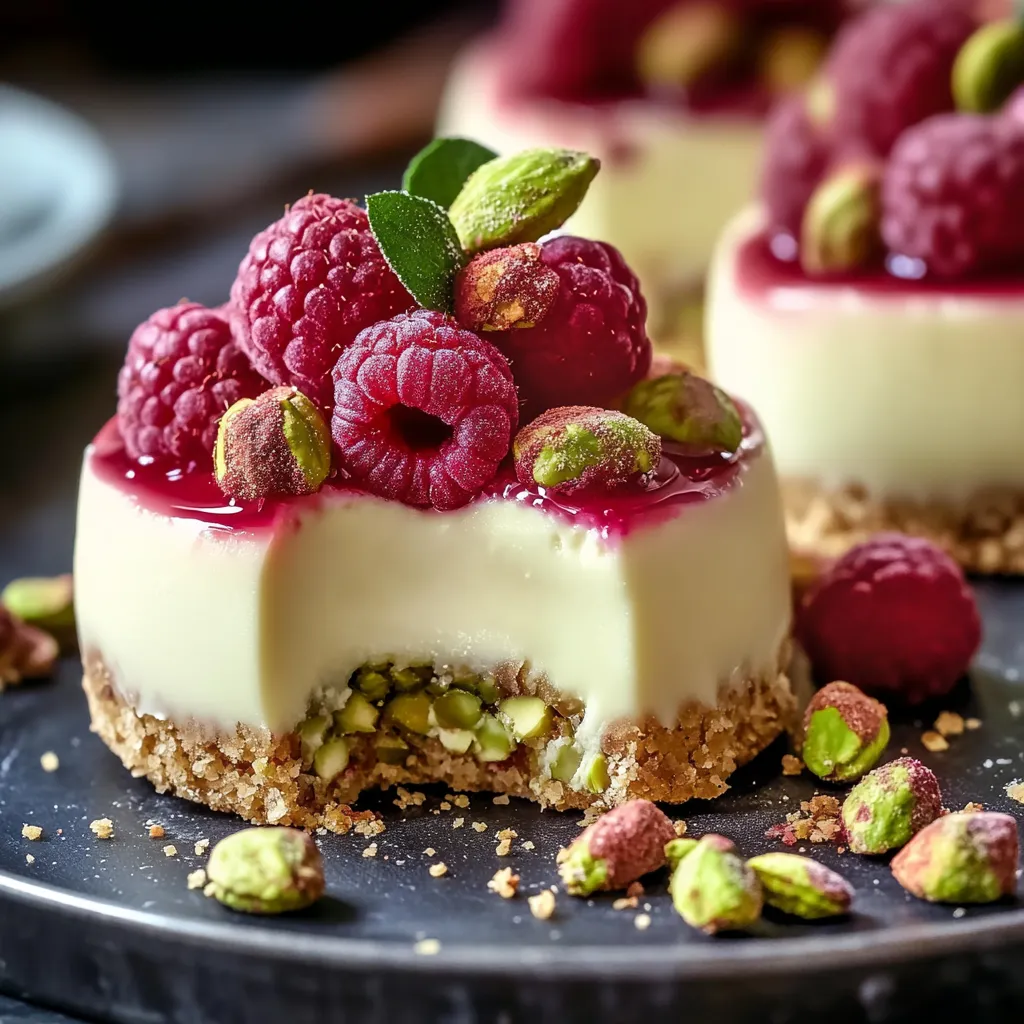
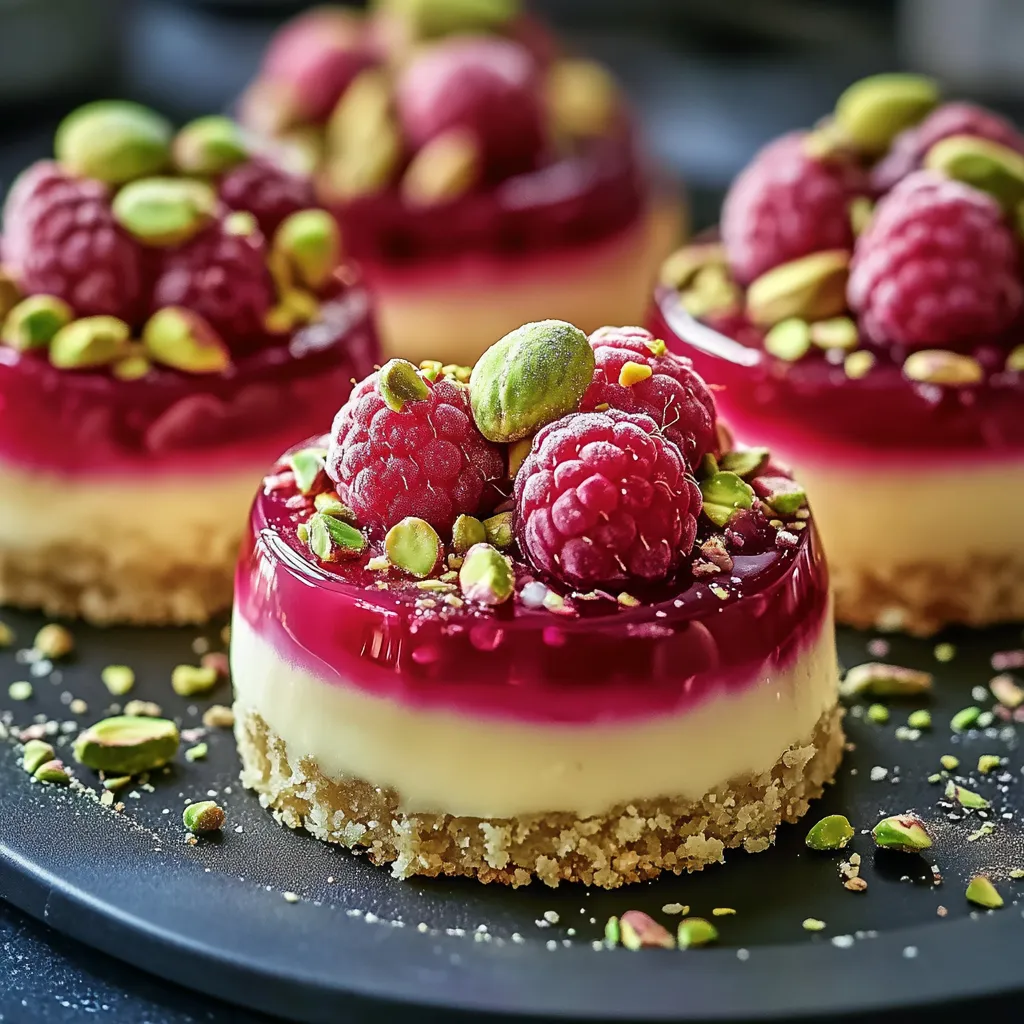
If you are looking for a dessert that is both elegant and easy to make, these Pistachio & Raspberry Cheesecake Domes are the perfect choice. They combine a crunchy pistachio crust, velvety smooth cheesecake filling, and fresh raspberries for a truly irresistible treat. Whether you are preparing them for a special occasion or simply indulging in a personal treat, these domes will elevate your dessert game without requiring advanced baking skills.
Ingredients for Pistachio & Raspberry Cheesecake Domes
- For the Pistachio Crust:
- ¾ cup unsalted pistachios, finely ground – Provides a rich, nutty crunch.
- ¾ cup digestive biscuits or graham crackers, crushed – Adds sweetness and structure to the crust.
- ¼ cup melted butter – Helps bind the crust together.
- For the Cheesecake Filling:
- 1 ½ cups cream cheese, softened – The star of the creamy, smooth filling.
- ½ cup powdered sugar – Adds a delicate sweetness without being overpowering.
- ½ teaspoon vanilla extract – Enhances the overall flavor profile.
- ¾ cup heavy whipping cream, cold – Helps create a light and airy texture.
- 1 teaspoon unflavored gelatin (optional, for extra stability) – Ensures a firm but smooth cheesecake consistency.
- For the Topping:
- 1 cup fresh raspberries – A tart contrast to the creamy cheesecake.
- 2 tablespoons crushed pistachios (for garnish, optional) – Adds extra crunch and a beautiful finish.
- Raspberry coulis or honey drizzle (optional) – Enhances the sweetness and presentation.
Step-by-Step Instructions
- Step 1: Prepare the Pistachio Crust
- Place pistachios and digestive biscuits (or graham crackers) into a food processor. Pulse until they form a fine, crumb-like consistency.
- Add melted butter and pulse again until the mixture is well combined and slightly sticky.
- Divide the crust mixture evenly into dome molds or lined cupcake tins. Press firmly to form a compact base.
- Place the molds in the freezer while you prepare the cheesecake filling.
 Pin it
- Step 2: Make the Cheesecake Filling
- In a large mixing bowl, beat cream cheese and powdered sugar until smooth and creamy.
- Add vanilla extract and continue mixing until fully incorporated.
- In a separate bowl, whip heavy cream until it reaches soft peaks.
- (Optional) If using gelatin, dissolve 1 teaspoon of gelatin in 2 tablespoons warm water, let sit for 5 minutes, then mix into the cheesecake filling.
- Gently fold the whipped cream into the cream cheese mixture, stirring until fully combined and smooth.
- Step 3: Assemble the Cheesecake Domes
- Remove the crust-filled molds from the freezer.
- Spoon the cheesecake filling evenly over the crust, smoothing the tops with a spatula.
- Cover with plastic wrap and chill in the refrigerator for at least 3 hours (overnight is best for the perfect set).
- Step 4: Garnish & Serve
- Carefully remove the cheesecake domes from the molds.
- Top each dome with fresh raspberries and a sprinkle of crushed pistachios.
- For added flair, drizzle with raspberry coulis or honey before serving.
How to Serve Pistachio & Raspberry Cheesecake Domes
- Elegant Plating: Arrange the domes on a platter with a dusting of powdered sugar and fresh mint leaves.
- Pairing Suggestions: Serve with a crisp white wine like Sauvignon Blanc or a sparkling rosé for a refreshing contrast.
- Extra Indulgence: A side of whipped cream or vanilla bean ice cream complements the richness perfectly.
Pro Tips for the Best Cheesecake Domes
- ✔ Use Cold Heavy Cream – Ensures a stable, fluffy texture when whipped.
- ✔ Chill for Best Results – Allowing at least 3 hours for setting ensures a smooth, firm consistency.
- ✔ Make-Ahead Friendly – Prepare a day in advance for stress-free entertaining.
- ✔ Experiment with Toppings – Try using strawberries, blackberries, or even edible flowers for a different twist.
Storage & Make-Ahead Instructions
- How to Store:
- Refrigerator: Store in an airtight container for up to 3 days.
- Freezer: Freeze before adding toppings for up to 1 month. Thaw in the fridge before serving.
- Can You Make These Ahead?
- Yes! These cheesecake domes are perfect for meal prepping or party planning. Assemble them a day in advance, store in the fridge, and garnish just before serving.
 Pin it
Recipe Variations & Customizations
- 🔥 Chocolate Pistachio Cheesecake Domes: Add 2 tablespoons of melted dark chocolate to the cheesecake filling for a decadent twist.
- 🍋 Lemon Raspberry Cheesecake Domes: Swap vanilla extract for lemon zest and a splash of fresh lemon juice for a citrusy contrast.
- 🥥 Coconut Pistachio Cheesecake Domes: Use crushed coconut cookies instead of graham crackers and top with toasted coconut flakes.
- 🌱 Vegan Option: Substitute dairy-free cream cheese, coconut cream, and a plant-based sweetener for a fully vegan version.
Final Thoughts
These Pistachio & Raspberry Cheesecake Domes are not only visually stunning but also incredibly delicious. The combination of nutty pistachios, creamy cheesecake, and fresh raspberries makes for a perfectly balanced dessert that is ideal for any occasion.
✨ Give them a try and enjoy a taste of elegance in every bite! 🍰💖
Frequently Asked Questions
- → Can I make these cheesecake domes ahead of time?
- Yes! They can be stored in the freezer for up to 2 days before serving.
- → What can I use instead of pistachio paste?
- Finely ground pistachios work as a substitute for pistachio paste.
- → Do I need to use gelatin?
- Gelatin helps set the mousse, but it’s optional if you prefer a softer texture.
- → How do I store leftovers?
- Store in an airtight container in the fridge for up to 3 days or freeze for up to a month.
- → Can I skip the biscuit base?
- Yes, but it adds a nice crunch! You can replace it with a layer of crushed nuts instead.