
 Pin it
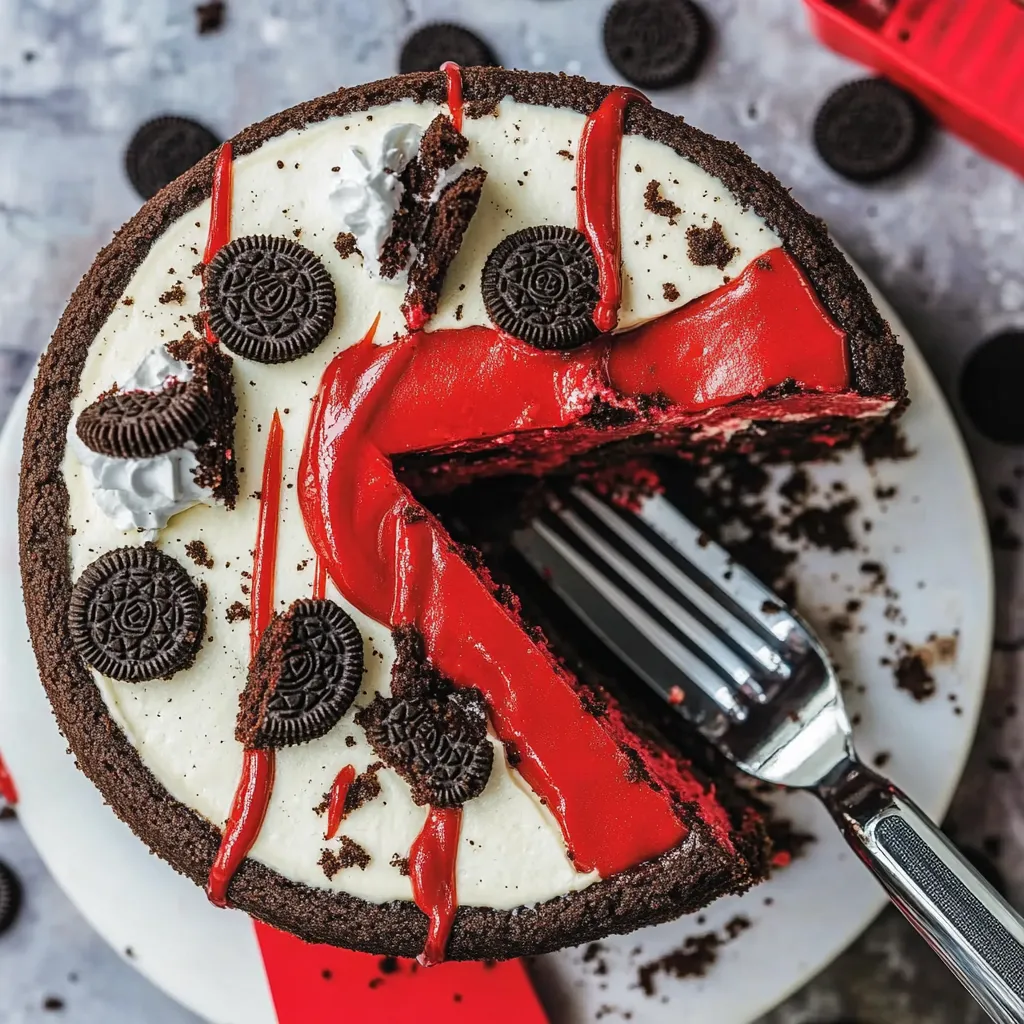
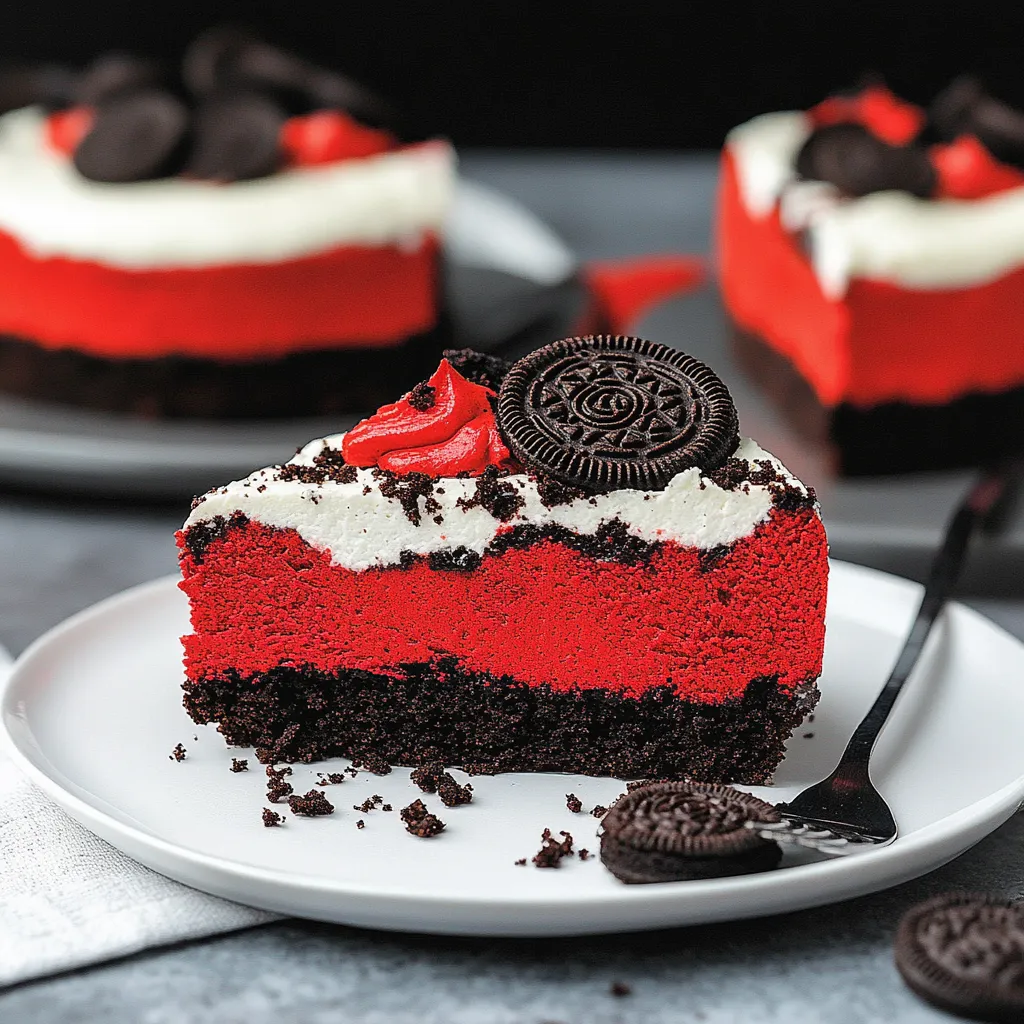
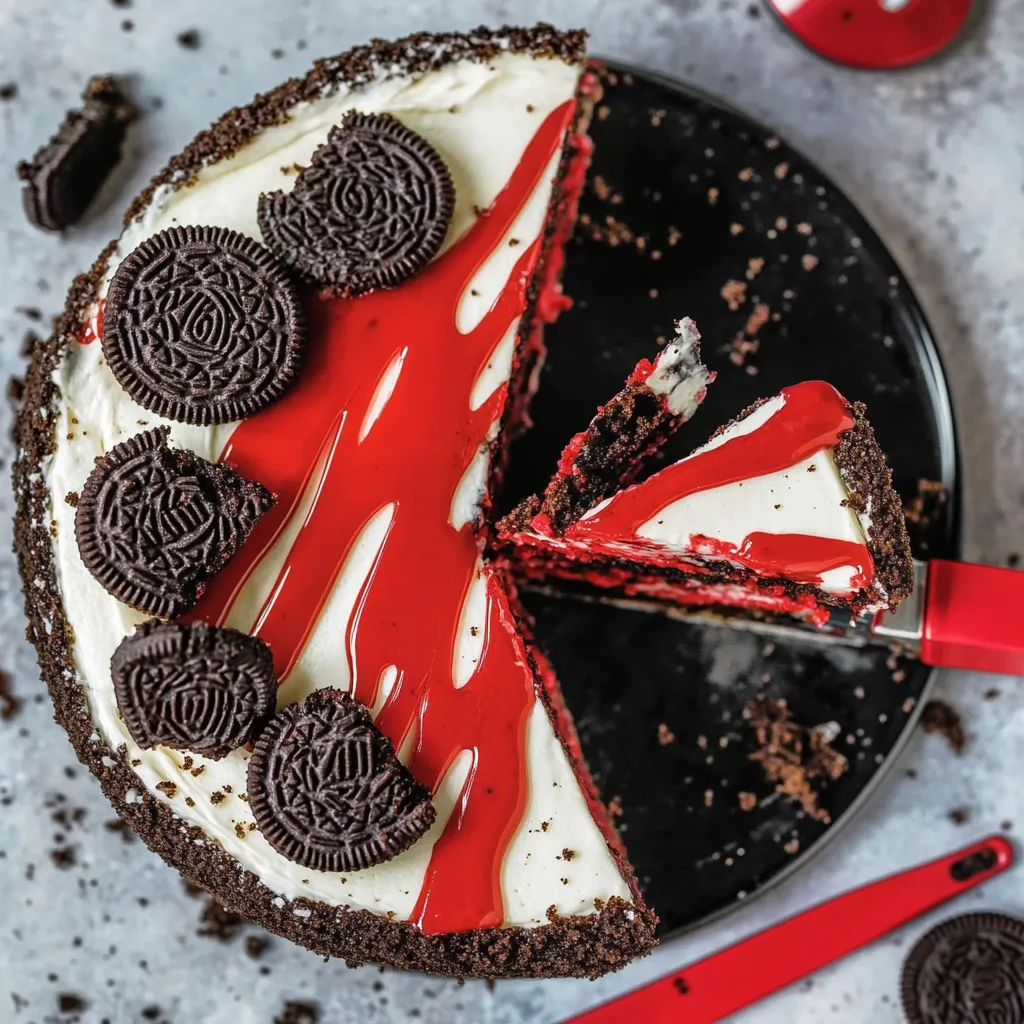
Every slice of this Red Velvet Oreo Cheesecake tells a story of perfect indulgence. After years of perfecting cheesecake techniques in my kitchen, I've discovered that the secret to this stunning dessert lies in the careful balance of temperatures and textures - creating a velvety smooth filling studded with chunks of Oreos, all nestled on a perfectly crisp cookie crust.
Last weekend, I served this at a dinner party, and my friend who "doesn't like cheesecake" asked for the recipe. The secret? Taking time with each step and letting the cheesecake cool gradually.
Essential Ingredients and Selection Tips
- Cream Cheese (24 oz) – Use full-fat Philadelphia brand at true room temperature. Generic brands can be too watery
- Oreos (2 cups for crust + ¾ cup for filling) – Regular, not Double Stuf, for the best crust texture. Crush them finely but not to dust
- Heavy Cream (¾ cup) – Use cream with at least 36% fat content for the richest texture
- Red Gel Food Coloring (1 tablespoon) – Gel coloring provides intense color without adding excess liquid
- Cornstarch (3 tablespoons) – This stabilizes the filling and prevents cracking. Don't substitute with flour
Detailed Cooking Instructions
- 1. Crust Creation
- Begin by crushing your Oreos into fine crumbs - a food processor works best. The butter should be just melted but not hot. Press the mixture firmly into the pan using a flat-bottomed glass for even compression.
- 2. Filling Preparation
- Start with truly room temperature ingredients - this is crucial for a smooth filling. Beat the cream cheese alone first until completely smooth, then add other ingredients gradually. The eggs should be added last, one at a time, mixing just until combined.
- 3. Baking Process
- The moderate oven temperature and slow cooling are key to preventing cracks. Never open the oven door during baking. The gradual cooling process is as important as the baking itself.
- 4. Assembly Strategy
- Pour the batter over the crust slowly to prevent air bubbles. Tap the pan gently on the counter a few times to release any trapped air.
 Pin it
Growing up watching my grandmother make cheesecakes, she always said patience is the key ingredient. This recipe proves her right.
Temperature Management
Keep your oven at a steady 325°F - too hot and the cheesecake will puff up and crack. The slow cooling process is crucial for perfect texture.
Make-Ahead Strategy
This cheesecake actually improves with time. Make it a day ahead for the best flavor and texture.
Decoration Technique
Wait until the cheesecake is completely chilled before adding toppings. Drizzle chocolate while it's slightly warm for the best flow.
 Pin it
This Red Velvet Oreo Cheesecake has become my signature celebration dessert. Through many iterations, I've found that success lies not just in the ingredients, but in the technique and patience required to create the perfect texture. Whether serving it for a special occasion or simply to make any moment memorable, it's guaranteed to impress.
Frequently Asked Questions
- → How long will the cheesecake last?
- It stays fresh in the refrigerator for up to 5 days when stored in an airtight container.
- → Is it possible to freeze this cheesecake?
- Yes, you can freeze it for up to 3 months. Wrap carefully in plastic wrap and foil.
- → Do I need any special baking equipment?
- You'll need a springform pan and an electric mixer, but no special techniques like a water bath.
- → What if the cheesecake develops cracks?
- No worries! You can easily cover any cracks with chocolate drizzle or whipped cream.
- → Can I prepare this cheesecake ahead of time?
- Definitely! You can make it a day or two in advance and keep it refrigerated.