
 Pin it
The first time I experienced the magic of chilaquiles (pronounced "chee-lah-KEE-lehs") was during a morning visit to my abuela's kitchen in central Mexico. There's something truly transformative about watching crispy tortilla chips soften slightly as they soak up that vibrant, spicy salsa, all topped with melty cheese and fresh garnishes. This traditional Mexican breakfast dish perfectly balances textures and flavors – crispy, saucy, tangy, and rich all in one glorious bite. While chilaquiles originated as a clever way to use day-old tortillas, they've become a beloved comfort food that graces breakfast tables across Mexico and beyond. My version stays true to those authentic roots while being accessible enough for any home cook to master.
I've served these chilaquiles at countless family gatherings, and they never fail to disappear within minutes. Last Sunday, I made a double batch for my sister's birthday brunch, and her food-critic husband declared them better than those from our favorite local Mexican restaurant. The secret? Taking the extra five minutes to make fresh salsa rather than using the jarred variety – that brightness makes all the difference.
Essential Ingredients and Selection Tips
- Corn Tortillas – Look for traditional yellow corn tortillas (not white) with minimal ingredients. Day-old tortillas actually work better as they have less moisture and fry up crisper. I source mine from a local tortilleria, but any quality brand will work. Avoid flour tortillas which become soggy rather than pleasantly tender
- Roma Tomatoes – Select ripe but firm tomatoes for the perfect salsa consistency. In summer, I sometimes substitute vine-ripened garden tomatoes for an even more intense flavor. The sweetness of fresh tomatoes creates a more balanced salsa than canned varieties
- Jalapeños – For authentic flavor, fresh jalapeños are essential. Adjust the heat by keeping or removing the seeds and membranes. I've found that one medium jalapeño with half the seeds removed creates the perfect medium heat that most people enjoy
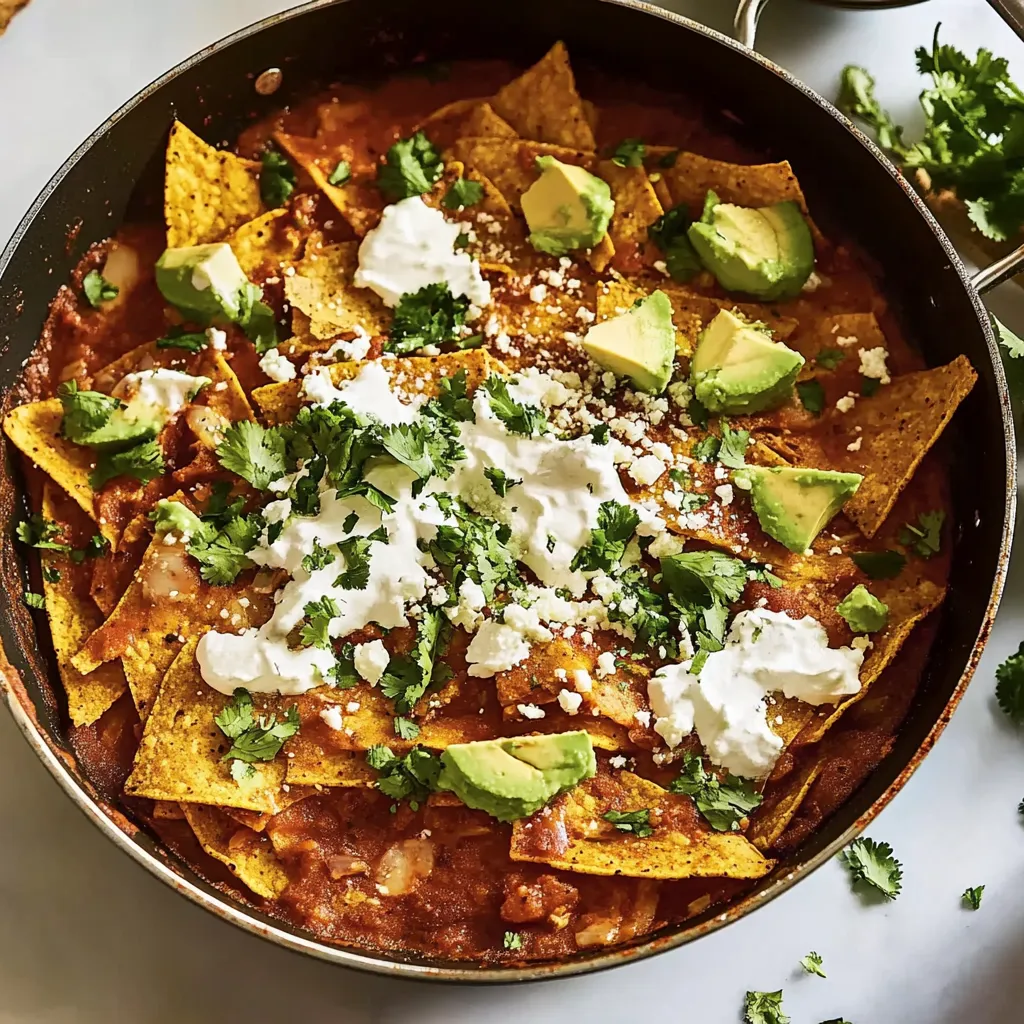
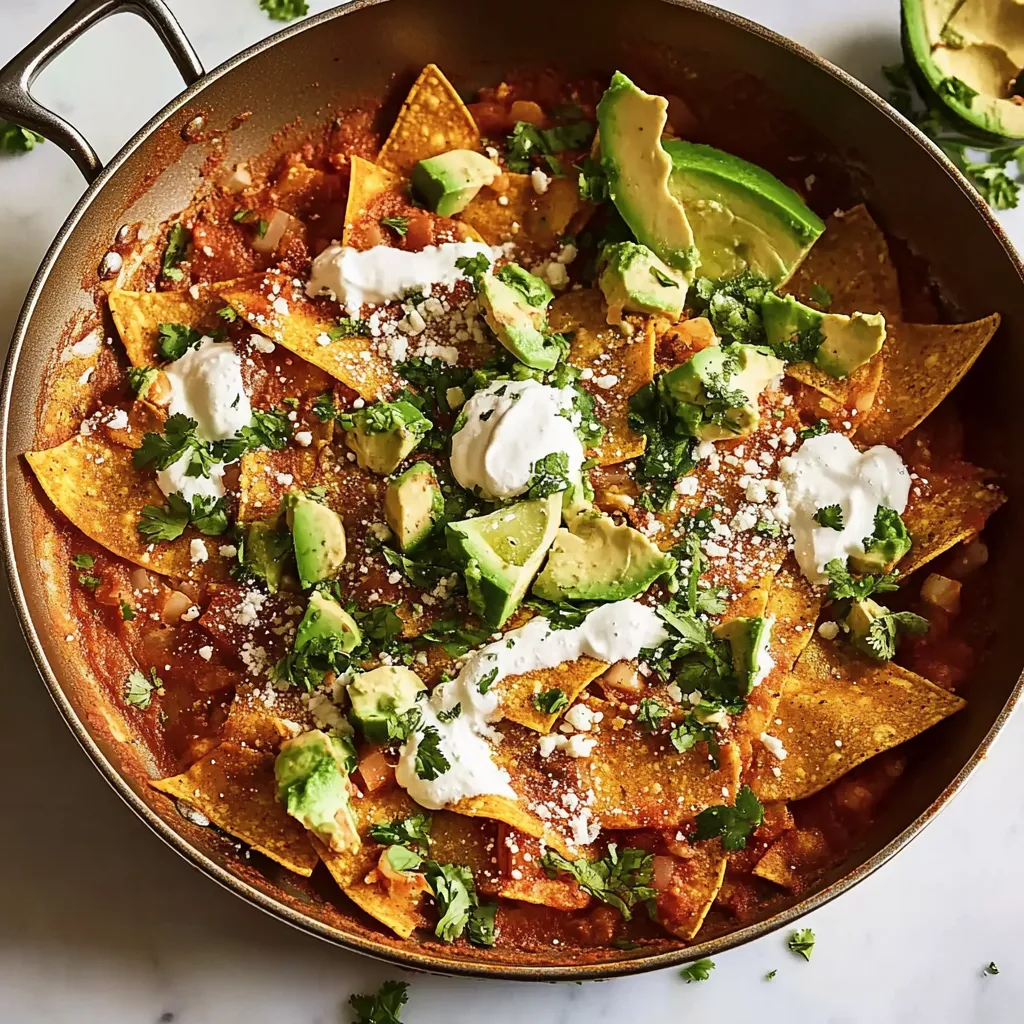
- Queso Fresco – This crumbly, fresh Mexican cheese adds the perfect finishing touch. If unavailable, substitute cotija cheese or even feta in a pinch. The slight saltiness and creamy texture create the perfect counterpoint to the spicy salsa
- Crema Mexicana – Thinner than sour cream with a slightly tangy flavor. If you can't find it, mix sour cream with a splash of milk for a similar consistency. This cooling element helps balance the heat of the salsa
After years of making chilaquiles, I've learned that the quality of your corn tortillas makes all the difference. When I changed from a mass-produced brand to locally made tortillas, the dish transformed. There's something magical about that authentic corn flavor and sturdy texture that stands up better to the salsa without becoming mushy.
Detailed Cooking Instructions
 Pin it
- Prepare Your Tortilla Chips
- Begin by cutting your corn tortillas into triangular wedges – I find that eighths work perfectly, providing the ideal size for scooping up toppings later. Heat a quarter cup of vegetable oil in a large skillet until it shimmers (about 350°F if you have a thermometer). Working in batches is crucial here – overcrowding the pan will steam rather than fry your tortillas, resulting in soggy chips. Add about a quarter of your tortilla wedges to the hot oil, allowing them enough space to float freely. Watch them carefully as they transform from soft to golden and crisp, flipping once during cooking to ensure even browning. This should take about 1-2 minutes per batch. Remember that they'll continue to crisp slightly as they cool, so remove them when they're just golden brown.
- Master the Draining Technique
- Using a slotted spoon or tongs, transfer your freshly fried chips to a paper towel-lined baking sheet, arranging them in a single layer to ensure proper drainage. While still hot, sprinkle them lightly with kosher salt – this is the moment when the salt adheres perfectly. Continue frying in batches, adding more oil if needed to maintain the right level in the pan. The goal is chips that are crisp around the edges but still have a slight tenderness in the center – this texture will allow them to absorb the salsa without falling apart completely.
- Create Your Vibrant Salsa Roja
- Now for the heart of the dish – the salsa. In a blender or food processor, combine your chopped tomatoes, yellow onion, sliced jalapeño, and peeled garlic cloves. Add a cup of chicken or vegetable broth to help everything blend smoothly. The liquid also ensures your salsa will have the perfect consistency – not too thick, not too thin. Pulse a few times to break everything down, then blend continuously until you achieve a smooth consistency. Some small chunks are perfectly acceptable and add wonderful texture to the final dish.
- Transform Your Salsa
- Heat two teaspoons of vegetable oil in a large skillet over medium-high heat until shimmering. This quick cooking step is what elevates homemade salsa from good to extraordinary. Pour in your blended salsa mixture, being careful as it may splatter initially. Cook the salsa, stirring occasionally, until it deepens in color and thickens slightly, about 5-10 minutes. This cooking process mellows the raw onion and garlic flavors while concentrating the tomato essence. If your salsa becomes too thick, simply add a splash of the remaining broth to achieve your desired consistency. The perfect salsa should coat the back of a spoon but still flow freely. Season with salt to taste – I usually find that about a teaspoon of kosher salt highlights the flavors perfectly.
- Combine Your Components
- Here comes the critical moment that defines authentic chilaquiles – adding the chips to the simmering salsa. Reduce the heat to medium-low before adding your fried tortilla chips to the skillet. Using a wide spatula, gently fold the chips into the salsa, ensuring each piece gets evenly coated. This requires a delicate touch – too much stirring will break the chips, too little will leave dry spots. The goal is to heat the chips through while allowing them to absorb some of the salsa without becoming soggy, about 2-3 minutes. You're looking for that perfect middle ground where the chips maintain some structure while soaking up the flavorful sauce.
- Serve With Flair
- Immediately transfer your chilaquiles to serving plates while still hot. This is a dish that waits for no one! Top with your chosen garnishes – diced avocado or guacamole adds creaminess, crema provides cooling contrast, queso fresco contributes salty notes, and a fried egg with its runny yolk creates rich decadence. I like to prepare all these toppings before starting the cooking process so everything can be assembled quickly once the chilaquiles are ready.
My grandmother taught me to make chilaquiles when I was barely tall enough to see over the stove. She would hand me stale tortillas to tear into pieces while she prepared her secret salsa recipe. Even now, decades later, the smell of sizzling corn tortillas instantly transports me back to her sunny kitchen in Oaxaca. She always insisted that chilaquiles should be served immediately – "No waiting for latecomers!" she'd declare. Now I understand why; that perfect texture is fleeting and must be enjoyed at its peak.
Regional Variations Worth Exploring
Chilaquiles vary dramatically throughout Mexico's diverse regions. In Oaxaca, they're often topped with string cheese and black bean puree. Mexico City versions tend to be saucier, almost soup-like. Northern regions sometimes include shredded chicken or beef. The beauty of chilaquiles lies in this adaptability – once you master the basic technique, you can explore endless regional variations.
I once traveled through central Mexico for a month, trying chilaquiles in every city we visited. What surprised me most was how the same basic ingredients could create such different experiences. In coastal areas, they were often topped with fresh seafood; in mountainous regions, wild mushrooms were a common addition. These explorations inspired me to experiment with fusion versions at home – my Korean-Mexican chilaquiles with gochujang-spiked salsa were a surprising hit at my last brunch gathering.
Mastering Chilaquiles Verdes
While this recipe focuses on chilaquiles rojos with tomato-based salsa, chilaquiles verdes with tomatillo salsa are equally delicious. To make this variation, substitute the tomatoes with 1½ pounds of husked and rinsed tomatillos. The cooking process remains the same, but the flavor profile shifts to bright, tangy, and herbaceous. I often add a handful of cilantro to the blender when making salsa verde for an additional layer of freshness.
The first time I made chilaquiles verdes was after growing tomatillos in my garden. Their papery husks hiding the sticky, bright green fruit fascinated my children, and harvesting them became a weekend activity. The resulting chilaquiles had a vibrancy that store-bought tomatillos simply can't match. If you have access to a farmers market in late summer, look for these unique fruits to experience authentic chilaquiles verdes.
The Art of the Perfect Fried Egg Topping
A perfectly fried egg is perhaps the most classic chilaquiles topping. The technique is simple but requires attention: heat a tablespoon of butter in a non-stick skillet over medium heat until foaming. Crack your egg into the pan, sprinkle with salt, and cook until the whites are set but the yolk remains runny, about 2-3 minutes. The yolk should act as an additional sauce, enriching the chilaquiles when broken.
My husband judges every chilaquiles dish by its egg – "The yolk must be runny, but not raw; the edges must be crispy, but not burnt," he insists. After years of practice, I've learned that using room temperature eggs and fresh butter makes all the difference in achieving that restaurant-quality finish.
Chef's Essential Tips
 Pin it
I learned these techniques through plenty of trial and error. My first attempt at chilaquiles resulted in a soggy mess because I added too much salsa too quickly. Another time, I tried to shortcut by using store-bought chips, only to have them disintegrate completely. Each "failure" taught me something valuable about this seemingly simple but actually quite nuanced dish.
The beauty of chilaquiles lies in their humble origins – a practical solution for using leftover tortillas that evolved into a beloved cultural staple. In my household, Sunday mornings are synonymous with chilaquiles. My children have grown up helping in the kitchen, just as I did with my grandmother. My daughter has become the designated salsa taster, while my son expertly manages the tortilla frying station.
What makes this dish so special isn't just its delicious flavor profile, but how it brings people together. There's something about setting out bowls of colorful toppings and watching everyone customize their perfect plate that creates connection and conversation. In our increasingly busy lives, these shared moments around the breakfast table have become precious traditions.
Chilaquiles teach us that simplicity often yields the most satisfying results. With just a handful of basic ingredients – tortillas, tomatoes, chiles, and accompaniments – we create something greater than the sum of its parts. This transformative quality is what I love most about Mexican cuisine: its ability to elevate humble ingredients through technique and tradition.
Whether you're making chilaquiles for a quiet family breakfast or a festive weekend brunch with friends, this recipe offers both comfort and customization. The basic framework remains consistent, but the endless variation possibilities mean you'll never tire of this classic. From my kitchen to yours, I hope these chilaquiles bring as much joy to your table as they have to mine for generations.
Frequently Asked Questions
- → Can I use store-bought tortilla chips for chilaquiles?
- Yes, you can use store-bought tortilla chips as a time-saving option. Look for thicker, sturdier chips that won't get too soggy when mixed with the salsa. You may need to adjust cooking time since they'll soften faster than freshly fried tortillas.
- → How can I make chilaquiles verde instead of roja?
- For chilaquiles verde, substitute the tomatoes with 1 pound of tomatillos (husked and rinsed). Roast the tomatillos, onion, jalapeño, and garlic until slightly charred, then blend with cilantro and proceed with the same cooking method.
- → Are chilaquiles supposed to be crunchy or soft?
- Traditional chilaquiles have a texture somewhere between crunchy and soft. The tortilla chips should absorb some of the sauce but still maintain some structure. If you prefer crunchier chilaquiles, add the chips just before serving.
- → What protein can I add to make chilaquiles more filling?
- Popular protein additions include shredded chicken, chorizo, or black beans. Simply cook your protein of choice separately and add it when combining the chips and salsa, or serve it on top.
- → Can I make chilaquiles ahead of time?
- It's best to prepare the components ahead of time rather than the complete dish. Make the salsa up to 3 days in advance and store in the refrigerator. Fry the tortilla chips up to 1 day ahead and store in an airtight container. Combine just before serving.