 Pin it
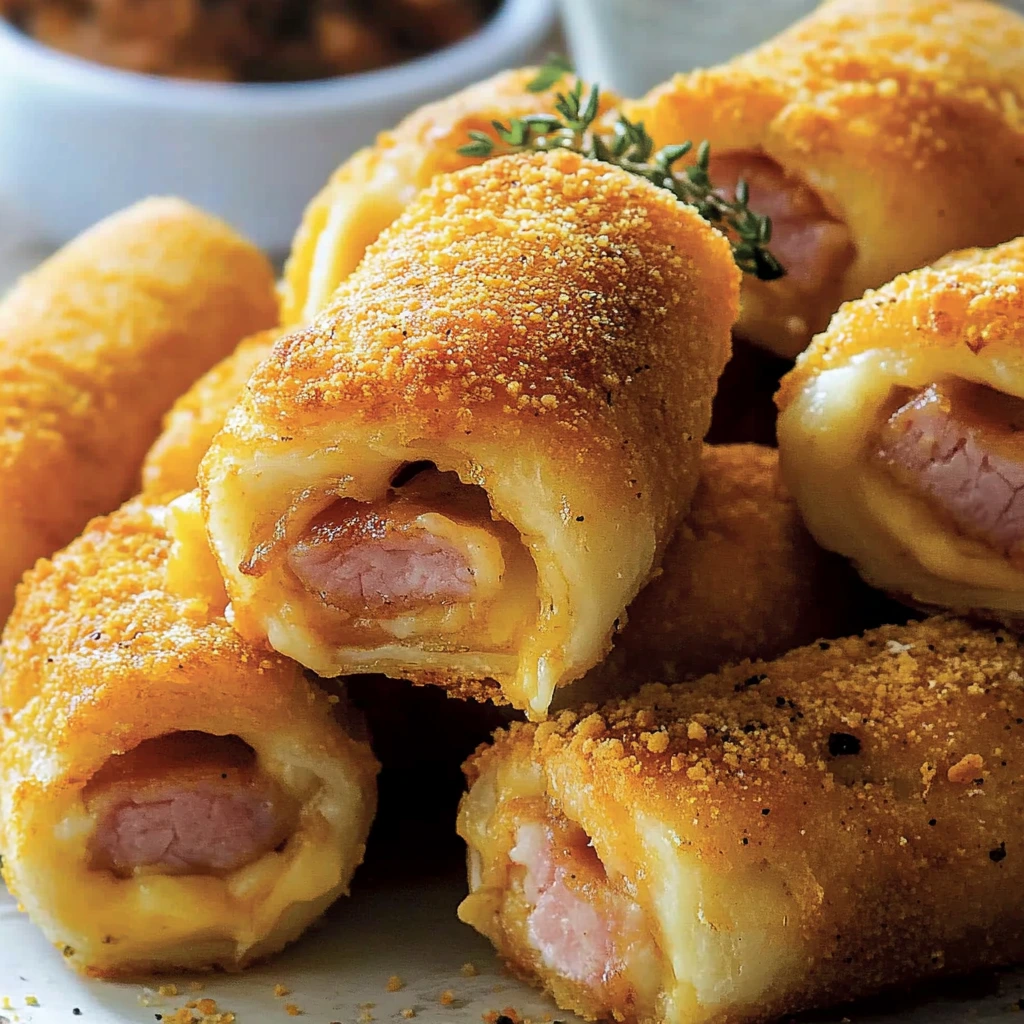
The moment you bite into a freshly made Ham and Cheese Bread Roll, you experience a perfect marriage of textures - a satisfying crunch of the golden exterior giving way to the warm, gooey cheese and savory ham inside. These delightful morsels have become a staple in my home kitchen, where they disappear moments after emerging from the frying pan. This simple yet impressive treat transforms ordinary ingredients into something truly craveable.
I prepared these for my nephew's birthday party last month, and they were the first appetizer to vanish from the table. Even the pickiest children were reaching for seconds and thirds! The secret to their appeal lies in properly sealing and chilling the rolls before frying, ensuring that perfect gooey center stays intact.
Essential Ingredients and Selection Tips
- Bread: Day-old white sandwich bread works best as it's easier to roll without tearing. The slightly drier texture also helps absorb less oil during frying. I prefer bread with a tight crumb structure rather than airy artisanal varieties
- Ham: Opt for thinly sliced deli ham that's not too wet. I find that honey or smoked ham adds a wonderful depth of flavor. Black Forest ham creates an especially nice contrast with the optional strawberry jam
- Cheese: Choose cheese that melts well. While classic cheddar is always reliable, a combination of mozzarella and sharp cheddar creates the perfect balance of stretch and flavor. Avoid pre-shredded varieties which contain anti-caking agents that can prevent proper melting
- Bread Crumbs: Panko bread crumbs create an exceptionally crispy exterior, but regular bread crumbs work well too. I sometimes mix in a tablespoon of grated parmesan for extra flavor
The quality of these simple ingredients directly impacts your final result. I've learned through many batches that the bread is particularly important - fresher bread tends to tear when rolling and absorbs too much oil during frying.
 Pin it
Detailed Cooking Instructions
- Prepare Your Workstation
- Begin by organizing your workspace for an assembly-line approach. Have your filling ingredients ready and within reach. Set up three shallow dishes: one for beaten eggs (I use 2 large eggs whisked with 1 tablespoon of water), one for bread crumbs, and a clean plate for the finished rolls. Cover your work surface with parchment paper for easy cleanup.
- Transform The Bread
- Remove the crusts from each bread slice using a sharp knife. Take your time with this step to ensure clean edges. Place each crustless slice on your work surface and use a rolling pin to flatten it thoroughly. Roll with gentle but firm pressure from the center outward in all directions until the bread is about 1/8-inch thick. The thinner you can get the bread without tearing, the better it will roll and seal.
- Layer The Fillings Strategically
- If using strawberry jam (which creates a delightful sweet-savory contrast), spread a very thin layer on the flattened bread - about 1/2 teaspoon per slice, focusing on the center area. Place a thin slice of ham that's slightly smaller than the bread slice on top. Add approximately 1 tablespoon of cheese in a line across the shorter end of the bread, leaving about half an inch of space on all sides to prevent leakage during frying.
- Master The Perfect Roll
- Starting from the edge with the cheese, tightly roll the bread into a compact log. Apply gentle pressure throughout the rolling process to ensure there are no air pockets. When you reach the end, lightly press the seam against the roll to seal it. If the edge isn't sticking, you can brush it with a small amount of egg wash as "glue." The tighter and more compact your roll, the less likely it is to open during frying.
- Seal With Breading
- Dip each roll into the beaten egg mixture, ensuring complete coverage. Allow excess egg to drip off, then roll in bread crumbs, pressing gently to adhere. Pay special attention to the seam and ends, as these are the areas most likely to open during frying. For an extra-crispy coating, you can double-dip by repeating the egg and bread crumb steps.
- Chill For Success
- Arrange the breaded rolls on a parchment-lined baking sheet with space between each roll. Place in the freezer for 15-20 minutes – not long enough to freeze solid, but enough to firm up the cheese and help the coating adhere. This crucial step prevents the cheese from melting too quickly and leaking out during frying.
- Fry With Precision
- Heat oil in a deep skillet or pot to 350°F – using a thermometer ensures perfect results. The oil should be about 1 inch deep. Working in small batches (4-5 rolls at a time), carefully lower the chilled rolls into the hot oil. Fry for about 2-3 minutes, turning occasionally, until they achieve a uniform golden-brown color. Watch carefully as they can go from perfect to over-browned quickly.
- Perfect The Draining Process
- Remove the rolls using a slotted spoon or spider, allowing excess oil to drip back into the pan. Place on a paper towel-lined plate in a single layer. For optimal crispness, arrange them so they're not touching each other. Let them rest for 1-2 minutes before serving – this brief rest allows the molten cheese inside to set slightly while maintaining its gooey quality.
I learned the importance of properly chilling the rolls before frying the hard way. During my first attempt, I skipped this step and watched in dismay as all my carefully prepared rolls burst open in the hot oil, creating a messy (albeit still delicious) cheese explosion!
Creative Variations
While the classic ham and cheese combination is unbeatable, these rolls welcome endless customization. For breakfast-inspired rolls, try filling them with scrambled eggs, crumbled bacon, and cheddar. My Italian-style variation with pepperoni, mozzarella, and a thin spread of pizza sauce receives rave reviews at parties. For a vegetarian option, sautéed mushrooms with spinach and Swiss cheese creates a sophisticated flavor profile.
Dipping Adventures
The right dipping sauce can elevate these rolls even further. For traditional flavor pairings, honey mustard or ranch dressing works beautifully. My homemade sriracha mayo (simply sriracha whisked into mayonnaise with a squeeze of lime) adds a spicy kick. For something unexpected, try a fruit chutney or sweet chili sauce which creates an intriguing sweet-spicy-savory combination.
Make-Ahead Magic
These rolls are perfect for preparing in advance. After breading, place them on a parchment-lined baking sheet, freeze until solid, then transfer to a freezer bag. They'll keep for up to 3 months. When ready to serve, simply fry them directly from frozen, adding an extra minute to the cooking time. This makes them perfect for last-minute entertaining or quick after-school snacks.
Air Fryer Alternative
While traditional deep-frying yields the best results, these rolls can be adapted for the air fryer. Spray the breaded rolls generously with cooking oil spray, then air fry at 375°F for 8-10 minutes, turning halfway through. The result is slightly less decadent but still delicious and significantly lighter in calories.
 Pin it
I discovered the importance of maintaining proper oil temperature during a family gathering where I tried to rush the process by overcrowding the pan. The resulting unevenly cooked rolls taught me that patience truly is a virtue when it comes to frying!
The beauty of these Ham and Cheese Bread Rolls lies in their versatility and universal appeal. Whether served as an after-school snack, party appetizer, or midnight treat, they never fail to bring smiles. I've watched children's eyes light up at their first bite and seen adults unconsciously reach for "just one more" long after declaring themselves full.
What makes these rolls special isn't just their delicious taste, but the memories they create – of kitchen experiments with my children, of lively parties where guests gather around the stove waiting for the next batch, of quick comfort food on rainy afternoons. The simple transformation of everyday ingredients into something extraordinary reminds me why I love cooking – it's about creating moments of joy through food that brings people together.
Frequently Asked Questions
- → Can I use other types of cheese?
- Yes! Any good melting cheese like mozzarella, cheddar, or Monterey Jack will work well in this recipe.
- → Can I bake these instead of frying?
- Yes, you can bake them at 375°F until golden, but they won't be quite as crispy as the fried version.
- → Can I make them ahead of time?
- You can assemble and freeze the breaded rolls ahead of time. Just fry them straight from the freezer when ready to eat.
- → What can I use instead of jam?
- You can skip the jam or substitute it with honey mustard or a thin layer of butter for a different flavor.
- → How do I store leftovers?
- Keep any leftover rolls in an airtight container in the fridge for up to 3 days. Reheat in the oven for best texture.
