
 Pin it
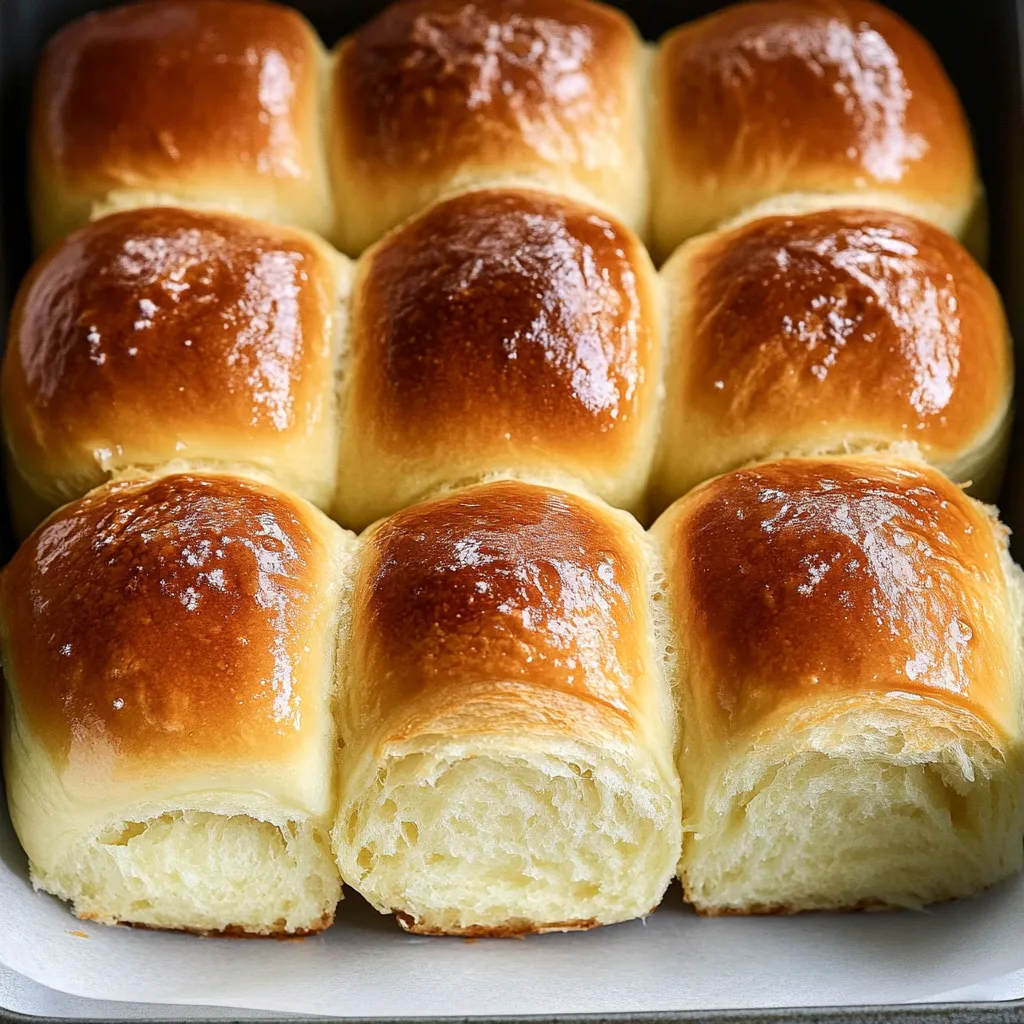
Super Soft Brioche Dinner Rolls
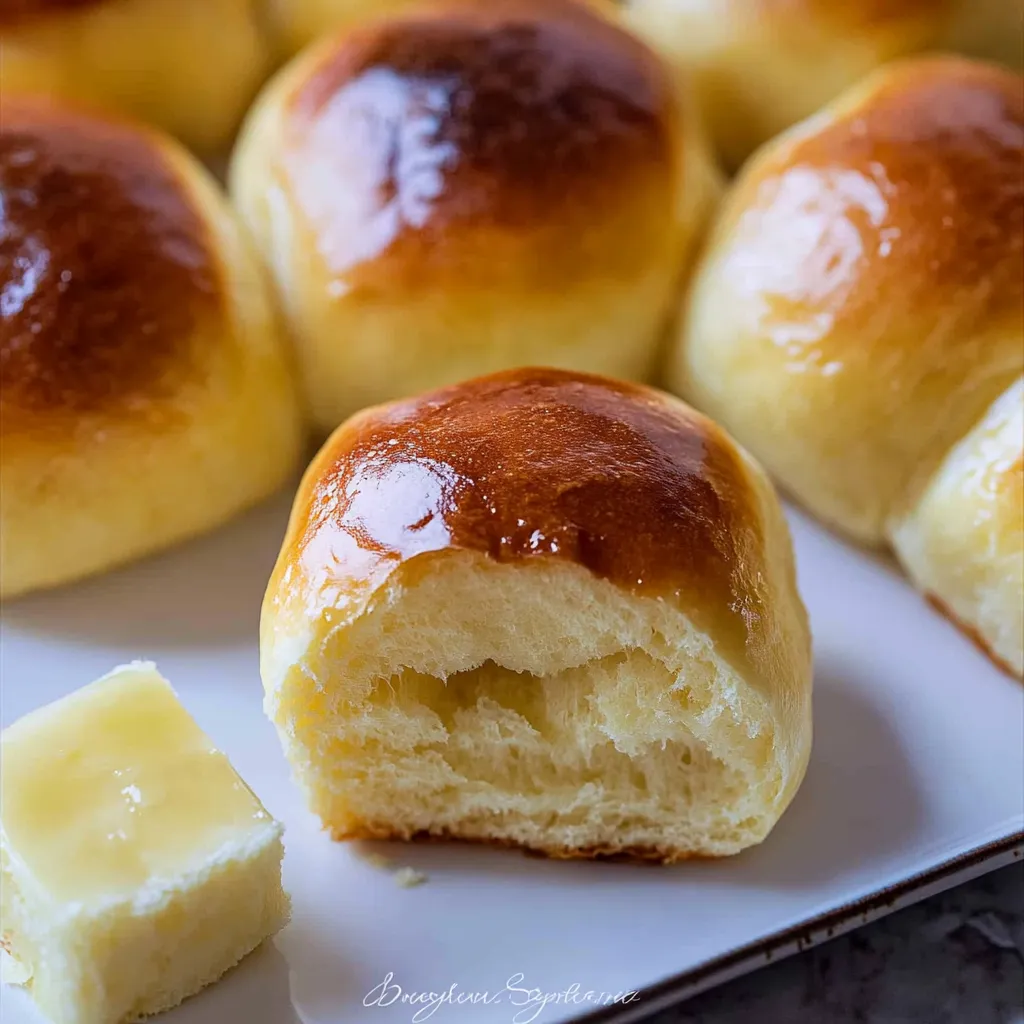
The moment these Soft Brioche Dinner Rolls emerge from the oven, golden brown and emanating an irresistible buttery aroma, you'll understand why homemade bread is a culinary treasure. These rolls are more than just a side dish - they're a celebration of texture, flavor, and the magical transformation of simple ingredients into something extraordinary. Buttery, soft, and with a delicate crumb that practically melts in your mouth, these brioche dinner rolls are destined to become the star of your meal.
Last Sunday, I prepared these rolls for a family dinner, and the kitchen was filled with anticipation as the bread rose and baked. My niece, who's usually picky about bread, couldn't stop eating them. Watching her spread butter on a warm roll and take that first delightful bite reminded me why homemade bread is so special.
Essential Ingredients and Selection Tips
- All-Purpose Flour: Choose a high-quality flour with consistent texture
- Active Dry Yeast: Fresh yeast is crucial for proper rising
- Warm Milk: Whole milk provides the best flavor and richness
- Sugar: Helps activate the yeast and adds a subtle sweetness
- Salt: Balances the flavors and enhances the overall taste
- Eggs: Provide richness and help create the soft texture
- Unsalted Butter: Use high-quality butter for the most luxurious flavor
- Egg Wash Ingredients: Fresh eggs for the perfect golden finish
Selecting ingredients is an art. Take your time to choose fresh, high-quality components. The difference between a good brioche and an exceptional one lies in the care you take with each ingredient.
Detailed Cooking Instructions
Yeast Activation
The journey begins with activating the yeast - a crucial step that sets the foundation for your brioche. In a large measuring cup, combine warm milk, active dry yeast, and a tablespoon of sugar. Whisk vigorously and let it sit for about 10 minutes. You're looking for a frothy, bubbling mixture that signals the yeast is alive and ready to work its magic.
 Pin it
Dough Mixing Technique
A stand mixer is your best friend for brioche. Begin by combining flour, eggs, salt, and the activated yeast mixture. Start mixing at a low speed, gradually increasing to high. Mix for 4-5 minutes until the dough begins to take shape. This is where patience becomes your most important ingredient.
Butter Incorporation
This is the most critical and time-consuming step. Cut the butter into small chunks and add them gradually to the dough. Continue mixing on high speed for 5-10 minutes. You're looking for a transformation - the dough should become smooth, elastic, and no longer stick to the sides of the bowl.
First Rise
Transfer the dough to a lightly oiled bowl. Cover with a kitchen towel or plastic wrap and let it rise for one hour until it doubles in size. Pro tip: Your oven's "proof" setting can help speed up this process if you're short on time.
Shaping and Second Proof
Punch down the dough to remove excess air. Divide it into 12 equal pieces and shape each into a perfect round ball. Place these in a deep 9x13-inch baking dish and let them proof for another hour. They won't need to double in size this time.
My grandmother always said that bread-making is about more than just ingredients - it's about love, patience, and understanding the magic of fermentation. These brioche rolls carry that wisdom in every bite.
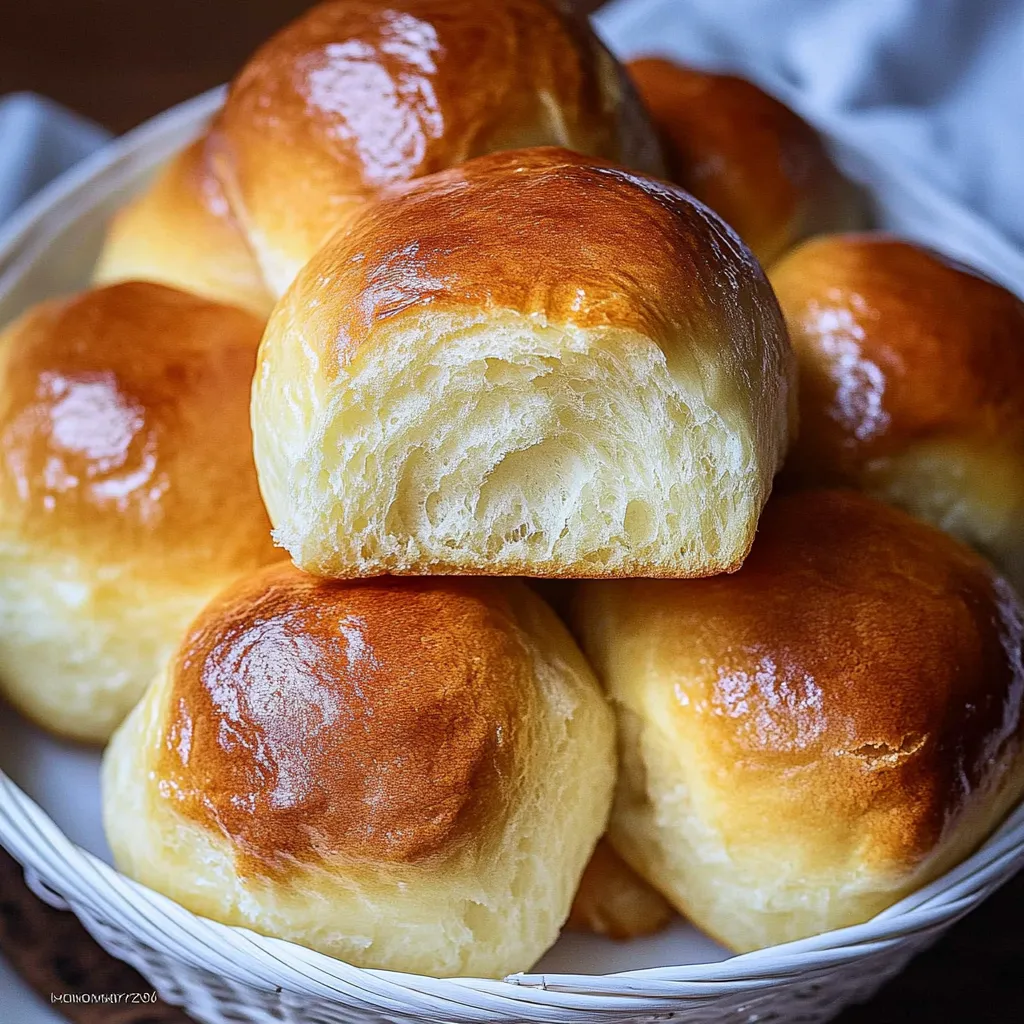
Versatility and Serving Suggestions
These rolls are a chameleon of the bread world. Serve them warm with extra butter, use them for mini sandwiches, enjoy them with jam or Nutella, or pair them with your favorite proteins. They're equally at home at breakfast, lunch, or dinner.
Preparation and Storage Wisdom
Make-ahead is possible and encouraged. After shaping the rolls, you can refrigerate them overnight. In the morning, let them sit at room temperature for 20 minutes before baking. They'll stay fresh at room temperature for 1-2 days and can be frozen for up to two months.
 Pin it
Cooking is an act of love, of creativity, of sharing. These brioche rolls are more than just bread - they're a connection to tradition, to family, to the simple joys of homemade food.
Personal Reflection
Every time I make these rolls, I'm transported back to my mother's kitchen, watching her hands work magic with simple ingredients. Bread-making is more than a cooking technique - it's a form of meditation, a way of connecting with generations past.
Final Thoughts
Creating the perfect brioche is about understanding the delicate balance of ingredients, temperature, and technique. It's a reminder that the most extraordinary things often come from the simplest of beginnings.
So preheat that oven, roll up your sleeves, and get ready to create something truly magical. Your kitchen will never smell better! 🍞💛
Frequently Asked Questions
- → Can I make these brioche rolls without a stand mixer?
- Yes, though it requires more effort. Mix ingredients with a wooden spoon, then knead by hand for 10-15 minutes until smooth and elastic. The butter incorporation will be particularly challenging and messy, so be patient.
- → Why is my brioche dough so sticky?
- Brioche dough is naturally sticky due to its high butter and egg content. Resist adding more flour, as this will make the rolls dense. The dough will become less sticky after proper mixing and the first rise.
- → Can I use instant yeast instead of active dry?
- Yes, use the same amount (1½ teaspoons) but you can skip the initial proofing step and add it directly to the dry ingredients.
- → How do I know when the rolls are properly baked?
- The rolls should be deeply golden brown on top and sound hollow when tapped on the bottom. An internal temperature of 190°F indicates they're fully baked.
- → Can I freeze these brioche rolls?
- Yes, cool completely then wrap tightly in plastic wrap and foil. Freeze for up to 2 months. Thaw at room temperature and warm in a 300°F oven for 5-10 minutes before serving.